How to Enable Save Order List Using Whols
The Save Order List feature in Whols – The Ultimate WooCommerce Wholesale Solution allows you to create, manage, and reuse product order lists for quick reordering and streamlined purchasing. This guide will walk you through creating and managing Save Order Lists for your WooCommerce store.
Benefits of Using Save Order List
Save Order List provides a powerful way to streamline the ordering process and enhance customer experience. Here’s how it can benefit your business:
- Efficient Reordering: Customers can save frequently ordered products and reorder them with a single click—saving time and minimizing errors in the reordering process.
- Enhanced B2B Capabilities: Wholesale customers can create multiple lists for different purposes, making inventory management more effective.
- Improved Customer Experience: Customers can plan purchases in advance, create templates for seasonal orders, and maintain consistent ordering patterns.
Steps to Create Save Order Lists
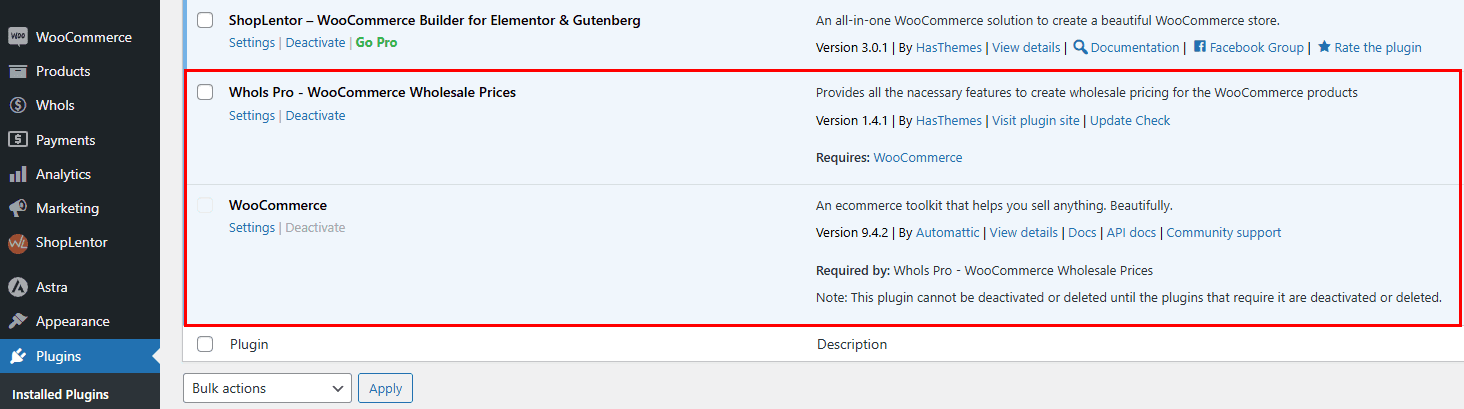
To create Save Order Lists, make sure that both WooCommerce and Whols Pro plugins are activated on your website.
Step 1: Navigate to Settings
Go to WordPress Dashboard > Whols > Settings. From the list of Settings, click on the Save Order List menu. You’ll see the Save Order List interface where you can:
- Enable Save Order List: Toggle the switch to enable/disable the feature.
- Maximum Lists per User: Set the maximum number of lists a user can create (set to “No Limit” for unlimited lists).
- Save List Button Text: Customize the text that appears on the save list button.
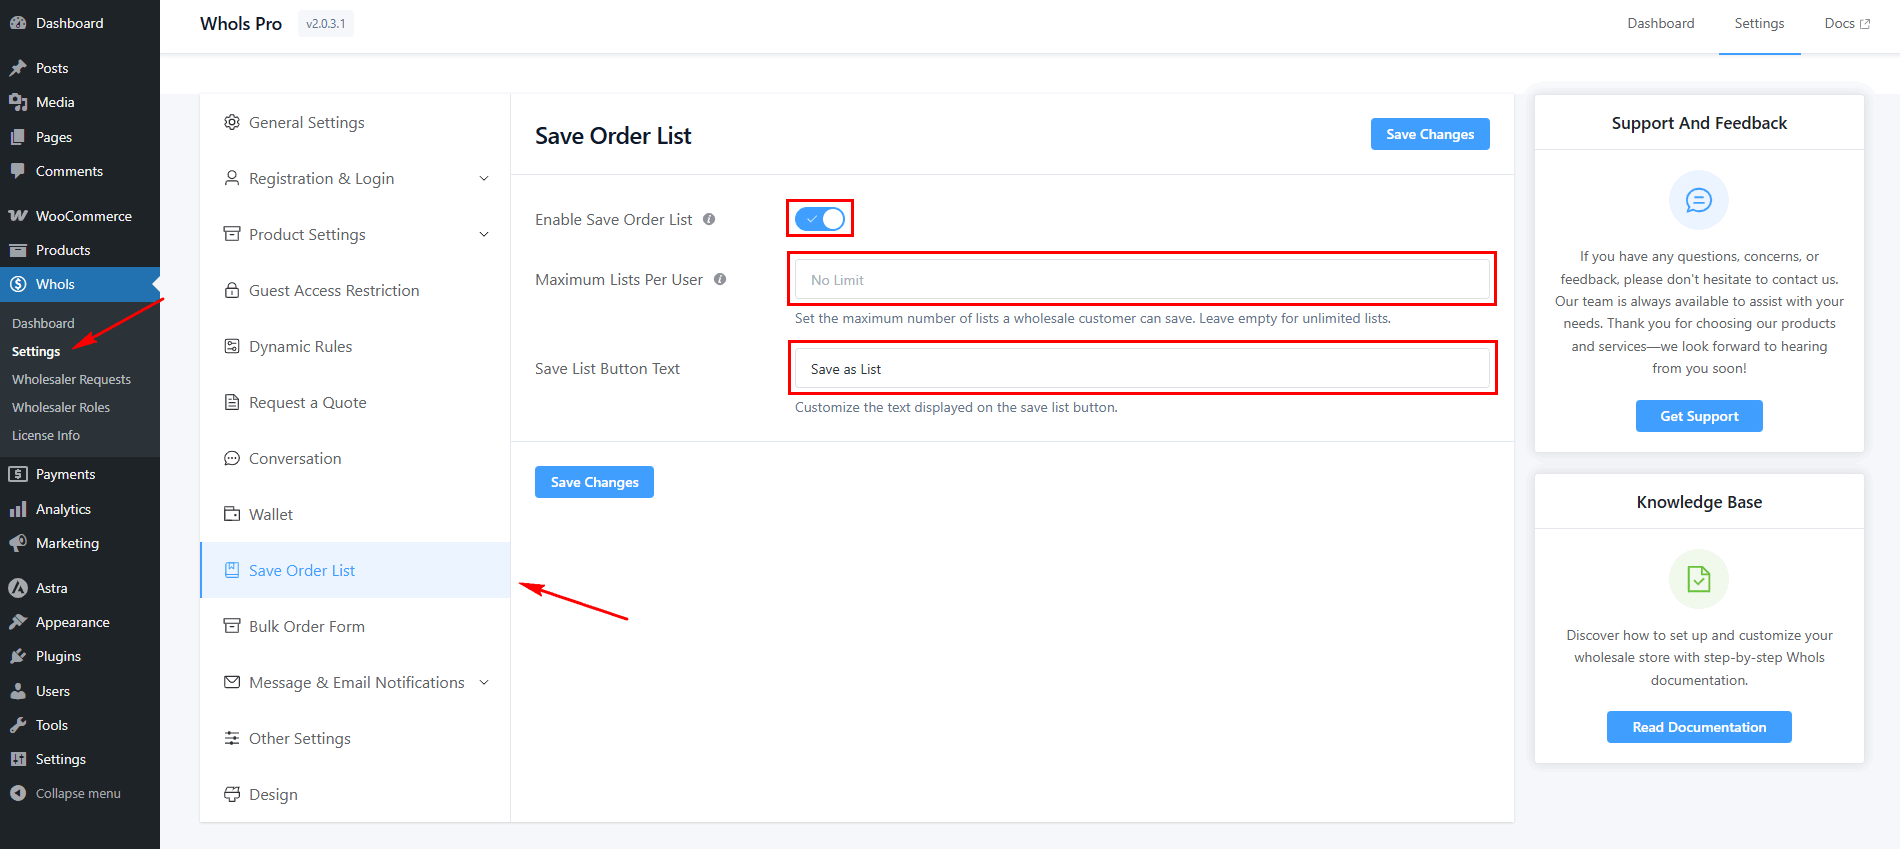
After configuring the fields, click the Save Changes button to apply the settings for this feature.
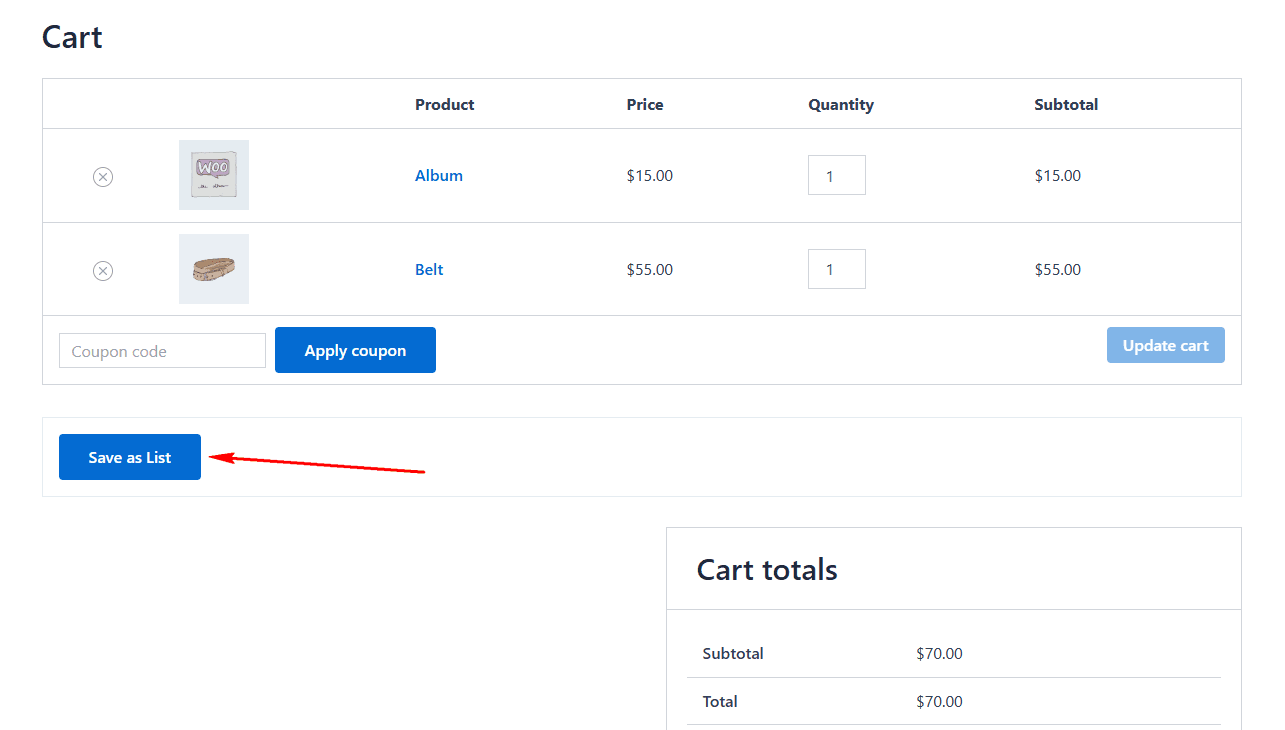
Step 2: Create a Save Order List
Once the feature is enabled, add products to your cart. Then go to the Cart page and click the Save as List button.
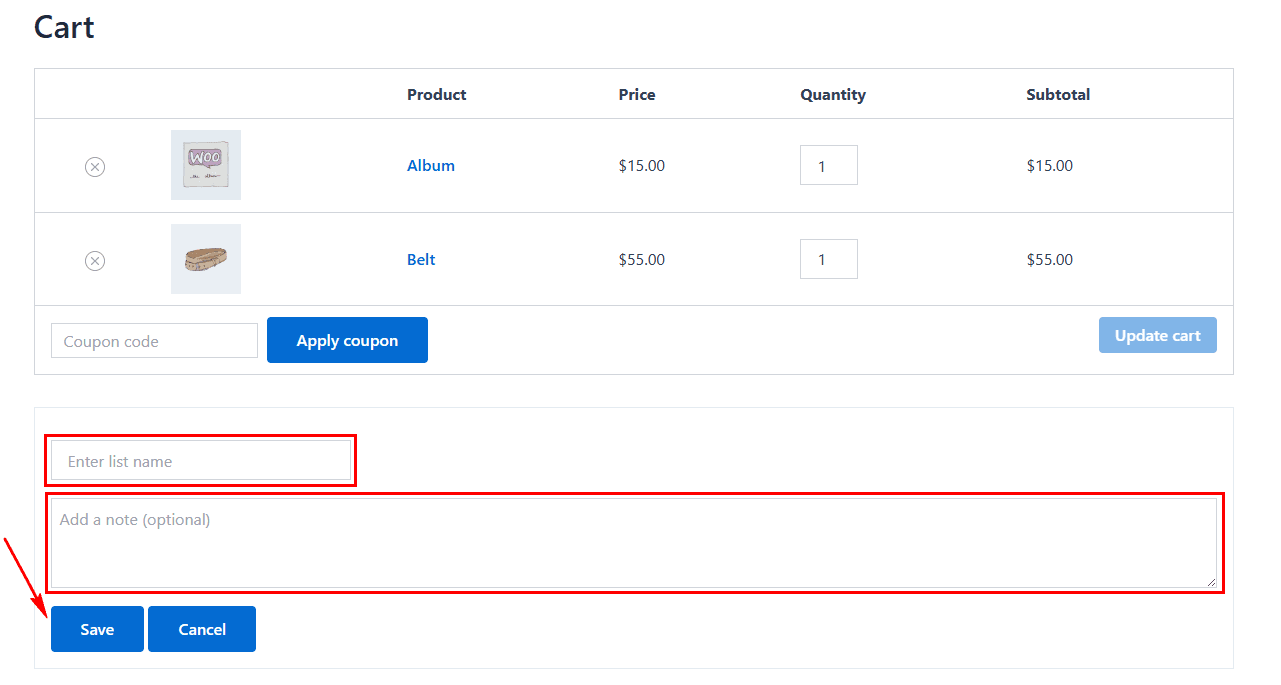
After clicking the button, a form will appear where you can:
- Enter a List Name
- Optionally, Add a Note
Then click the Save button to create your list.
Once saved, you can easily reorder all items from the list at any time without delay.
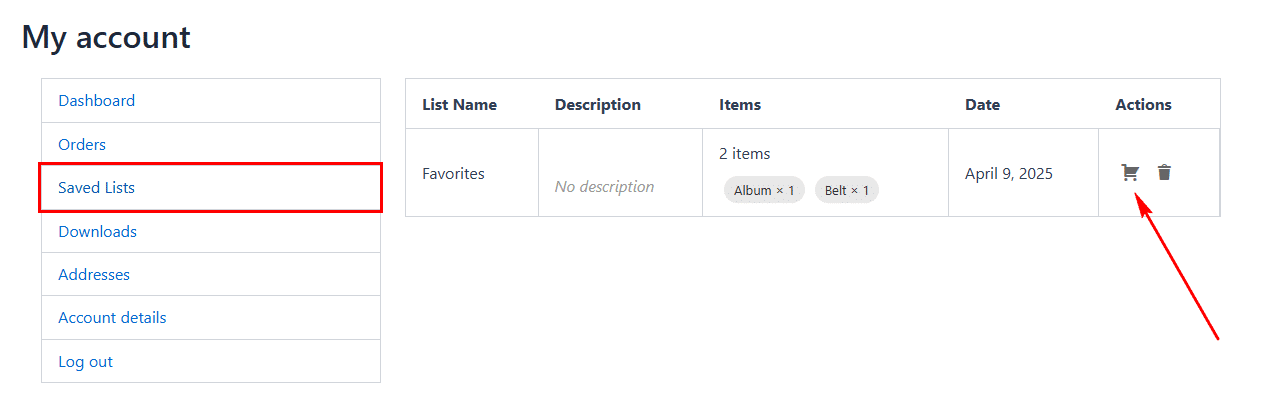
Step 3: Manage Your Saved Lists
Navigate to My Account > Saved Lists. Here, you can view all your saved lists. Use the action buttons to:
- Add all items to the cart
- Delete lists as needed
That’s it! Thank you for choosing Whols to enhance your WooCommerce store. If you need additional assistance, feel free to contact our support team. Our dedicated support team would be more than happy to assist you.
Last updated on November 27, 2025
Was this article helpful?
Powered by Support Genix