How to Customize WooCommerce Thank You Page Content
The Custom Thank You Message feature in Whols plugin enables B2B stores to display personalized order confirmation messages, enhancing professional communication with wholesale customers through the WooCommerce platform.
Accessing the Custom Thank You Message Settings
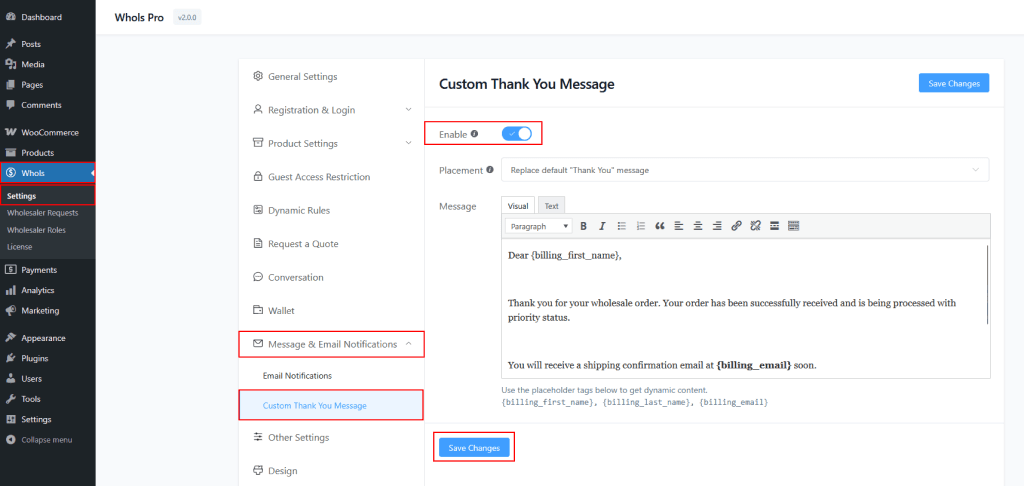
Access the custom thank you message feature by navigating to WordPress dashboard > Whols > Settings > Message & Email Notifications > Custom Thank You Message.
Enable the Feature
Check the “Enable ☑” box to activate the custom thank you message functionality.

Message Placement Options
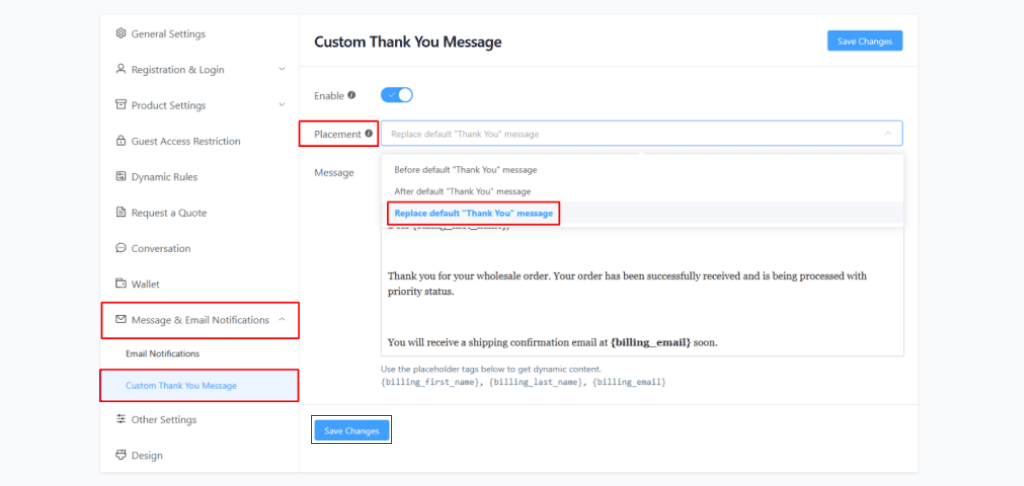
- Before default “Thank You” message: Displays custom message above the default WooCommerce confirmation for highlighting priority wholesale information.
- After default “Thank You” message: Shows custom message below the default confirmation for providing additional wholesale-specific details.
- Replace default “Thank You” message: Removes the default confirmation and shows only the custom message for complete control over the content.

Using Dynamic Content
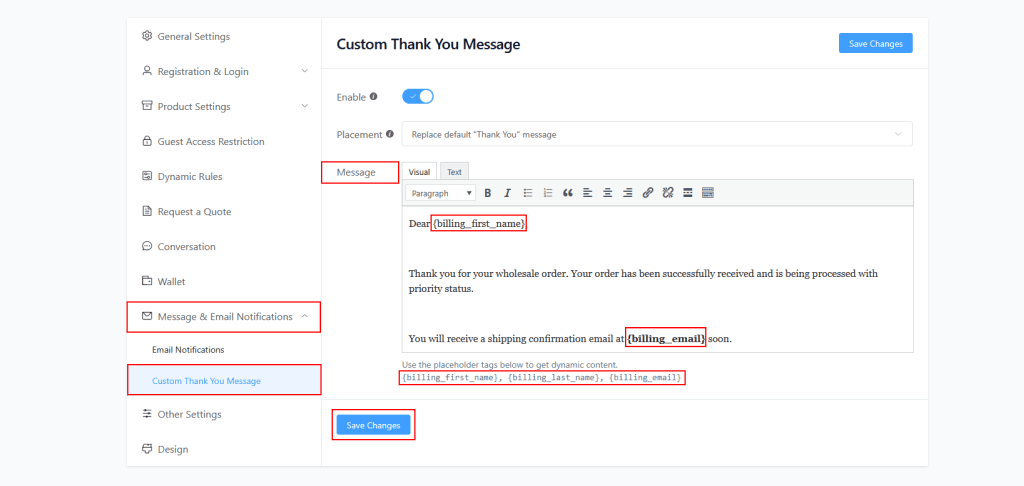
Built-in dynamic placeholder tags automatically insert customer information into thank you messages, ensuring personalized communication with each wholesale customer.
{billing_first_name}: Automatically inserts customer’s first name{billing_last_name}: Automatically adds customer’s last name{billing_email}: Automatically includes customer’s email address

Frontend Implementation
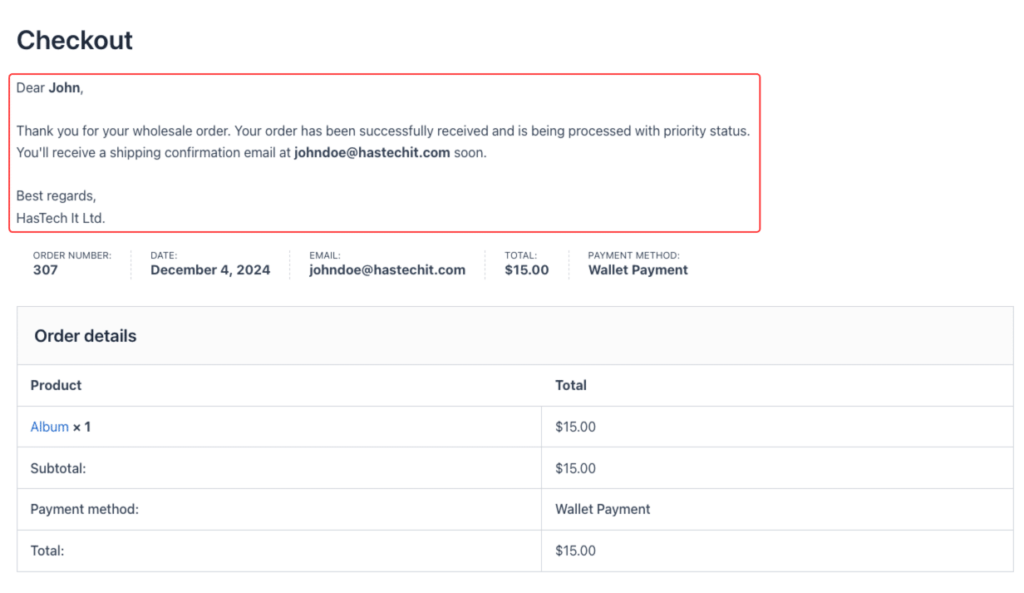
After configuring the custom thank you message, it appears on the order confirmation page (checkout/order-received/) in the following format:

This layout ensures a professional presentation where the custom thank you message seamlessly integrates with WooCommerce’s standard order confirmation details, providing wholesale customers with all necessary information in a structured format.